
Aluminum fence installation isn’t hard to do on your own. Digging the holes will be the hardest part. However, the rest of the fence assembles easily and requires limited tools.
Tackling your aluminum fence installation yourself will save you thousands of dollars. It will also give you a sense if accomplishment and something to be proud of.
In this article, we’ll review the tools needed for aluminum fence installation. What steps to take before purchasing aluminum fence and finally, how to install one. And last, we’ll cover two methods of aluminum fence installation.
The first method uses brackets to attach the panels to the posts. In the second method, panels insert into routed holes in the posts.
Tools for Aluminum Fence Installation
If you’re any kind of DIYer, chances are, you probably already have all of the tools required for aluminum fence installation except for the post hole auger.
Although, it is perfectly acceptable to dig all of the holes by hand with manual post hole diggers. It is recommended to rent an auger for digging holes. However, an auger will save lots of time and labor.
Aluminum Fence Installation Tool List
- Gas Powered Auger – For drilling post holes
- Manual Post Hole Diggers – For cleaning out angered holes or manually digging holes
- Wheel Barrel – For mixing concrete in
- Mixing Shovel – For mixing concrete
- Wood or Metal Stakes – For laying out fence lines
- String Line – To tie between stakes ensuring straight fence lines
- Sledge Hammer – For pounding stakes into the ground
- Level – For plumbing fence posts
- Hacksaw – For cutting fence sections
- Cordless Drill with Nut Driver – For installing self drilling screws
- Measuring Tape – For measuring posts hole depth and spacing
- Marking Paint – For marking post hole locations on the ground
Pre Aluminum Fence Installation Checklist
Before purchasing an aluminum fence and definitely before installing one, there are some things to get in order. Planning ahead of times will prevent costly problems later.
Following this recommendations list will keep you legal, prevent feuds with neighbors and most importantly, keep you safe during your aluminum fence installation.
Pre Installation Checklist
- Check Building and Zoning Codes – Check with the city and county building and zoning departments. Make sure the fence style and height is permitted. Furthermore, make sure the location of the fence is allowed.
- Get Home Owners Association Approval – Check for special restrictions or requirements. Many HOA’s have stricter rules than cities and counties. Get approval if required.
- Permits – Pull a fence permit when required. Most fence permits cost between $25.00 to $100.00. Pulling a fence permit will confirm you are meeting codes. It also prevents neighbors from stopping your aluminum fence installation.
- Get a Survey – When property pins cannot be located, get a survey. Nobody wants to spend the extra money on a survey. However, a survey is less expensive than moving a line of fence at a later date.
- Let Neighbors Know – This step isn’t a necessity. However, from my experience, it helps. Neighbors don’t like change or surprises. Give them a heads up a week or two before the project begins.
- Call 811 – Call ahead of time to have the underground utilities marked. A minimum of 48 hours before required before digging. This will help avoid hitting or damaging costly lines. Furthermore, it will keep you safe!
- Dedicate the Time – Depending on the total amount of footage, your aluminum fence installation will take between 1 – 3 days. Make sure you have the time to do it! Especially when renting equipment. The leaf amount of days the better!
Installing Aluminum Fence
Your aluminum fence installation will use one of two methods. The first method uses routed fence posts. In this method, the rails of the panels fit into the routed holes in the posts. As a result, the fence assembles one post and one panel at a time.
The second method uses brackets that fasten the panels to the posts. Therefore, all of the posts are installed first. Once the concrete sets, brackets fasten the panels to the posts.
In the fencing industry, both methods are standards. Your manufacturer will specify the method required for your aluminum fence installation.
The Routed Post Method of Installation
Aluminum fence installation with routed posts requires building the fence one post and panel at a time. You cannot set all of the posts first and then attach the panels later.
Routed fence posts also require setting and adjusting them to height during the installation process. Even though this method is slightly more difficult to install, it is the most popular.
Routed Aluminum Fence Posts
Routed aluminum fence posts come in four configurations. An end post which will have holes routed on one side of the post. A corner post which will have holes routed on two perpendicular sides of the post.
A line post which has holes routed on two opposing sides of the posts. And a blank post which will not have any holes routed into it.
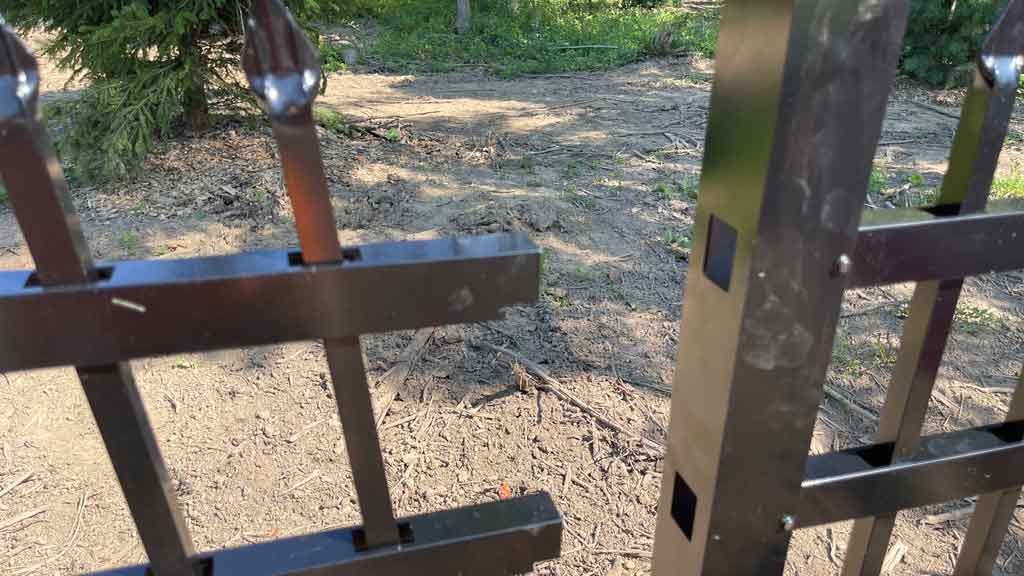
Aluminum Fence Panels for Routed Posts
The panels used for routed post aluminum fence installation look the same as any other aluminum fence panel. However, there is one main difference. There is a notch located at the end of each rail which fits inside of the routed hole located on the post.
As a result, the rails must be inserted into the posts when loose, before the concrete hardens. Furthermore, when a panel requires cutting to a shorter length, the notch must be cut back into the end of the rail in order for it to fit into the post.
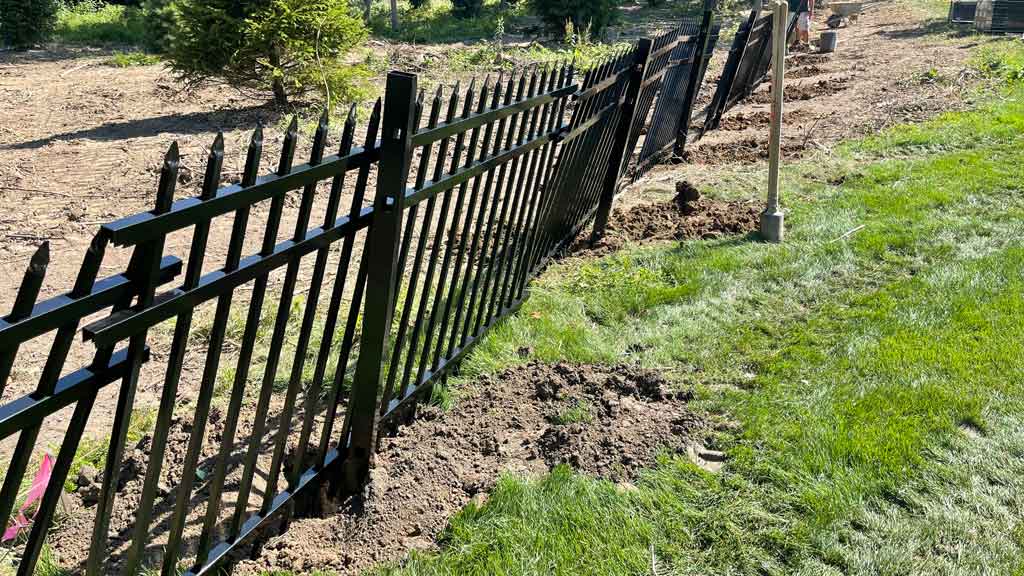
Installing Aluminum Fence with Routed Posts
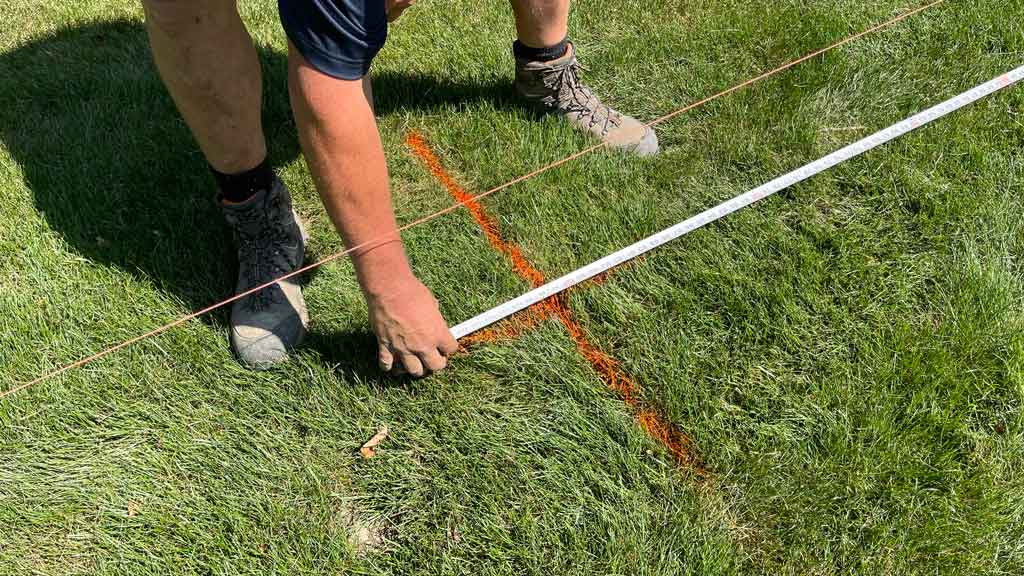
The first step of aluminum fence installation is establishing the fence line. Drive wooden or steel stakes into the ground at the ends and corners of the fence line.
A string line is the tied to the stakes and pulled tightly. This will provide a straight line to plumb the posts to.
The next step is to dig the first post hole. Use post hole diggers when next to foundations or near utilities. Dig the hole to the manufacturers recommended depth.
Make sure to remove loose dirt spoils. Insert the first post into the hole. Check for proper depth and plumb to the string line.
Once correct, shovel concrete around the post, filling to just a few inches below grade. Cap the hole with loose dirt spoils and check for plumb again.
Measure out and dig the next few holes according to manufactures specifications. Do not dig the all of the holes for the entire fence. This prevents shaving every hole if an adjustment to the post spacing is required.
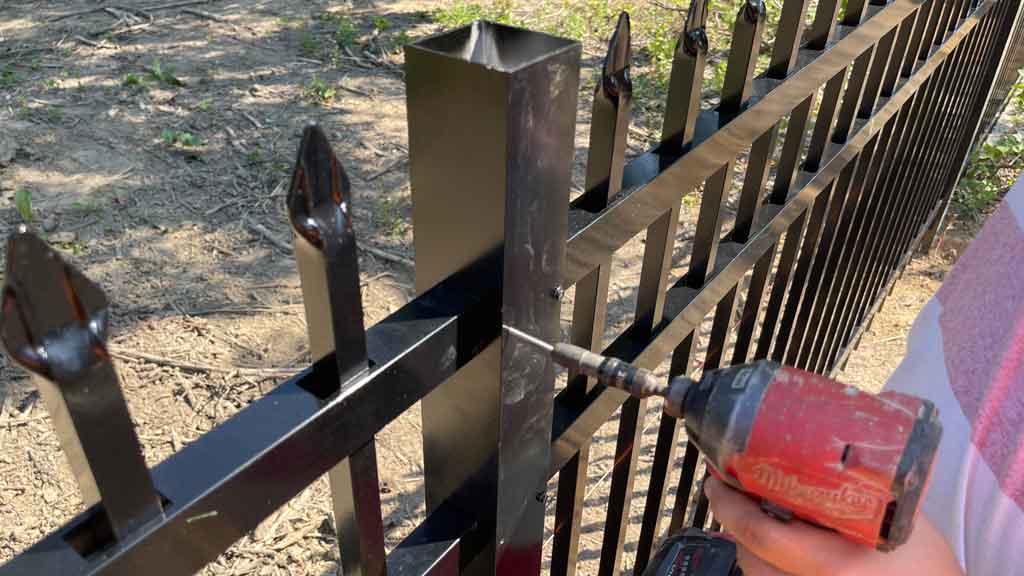
Insert a panel into the first post and secure using a cordless drill and self drilling screws. Place a post into the next hole and insert the rails of the panel into the routed holes of the post.
Check that the post is plumb to the string line and add concrete. Secure the panel to post using self drilling screws. Repeat this process until the end of the fence line is reached.
Adjusting the Heights of the Posts
Before moving onto the next line of fence, adjust the heights of the installed fence posts. Shorter fence lines are easier to run straight. However, it is uncommon for the fence line to run perfectly straight from one end to the other.
Set the posts to height at each point where the grade changes. Adjust heights of the remainder of the posts so that the fence line flows smoothly.
Avoid hard breaks. Drive post down that are too high using a sledge hammer and block of wood to prevent damaging the post.
Pull low posts up higher than needed, allowing concrete to fall into place under them. Then tap downward into place. This prevents them from slowly lowering as a result of suction caused when pulling them upwards.
Repeat this process throughout the aluminum fence installation for each fence line. Install gate posts using the same process.
However, the measurement between gate posts will be a different measurement specified by the manufacture. Furthermore, the gate must hang level.
Therefore, gate post must be level across the tops no matter what the change in grade is inside the gate opening.
The Bracket Method of Installation
Aluminum fence installation using brackets is easier than routed post. The main reason is all the posts are installed first without attaching the aluminum fence panels.
Furthermore, the posts don’t require setting to the exact height. Posts installed slightly higher than specified are cut to height once the panels are attached.
Another benefit to the bracket method of aluminum fence installation is the panels are removable. As result, allowing access of larger equipment for future backyard projects without the up front cost of purchasing a wide double gate.
Aluminum Fence Posts with Brackets
The posts for aluminum fence installation with brackets are all blanks. As a result, there is no need to worry about ends, corner or line posts. However, the gate posts are usually larger in size and have heavier wall thicknesses.
To make installation easier, it is a good idea to purchase slightly longer posts than specified. This allows cutting posts heights after panels are attached. Therefore saving time while setting them.
Aluminum Fence Panels with Brackets
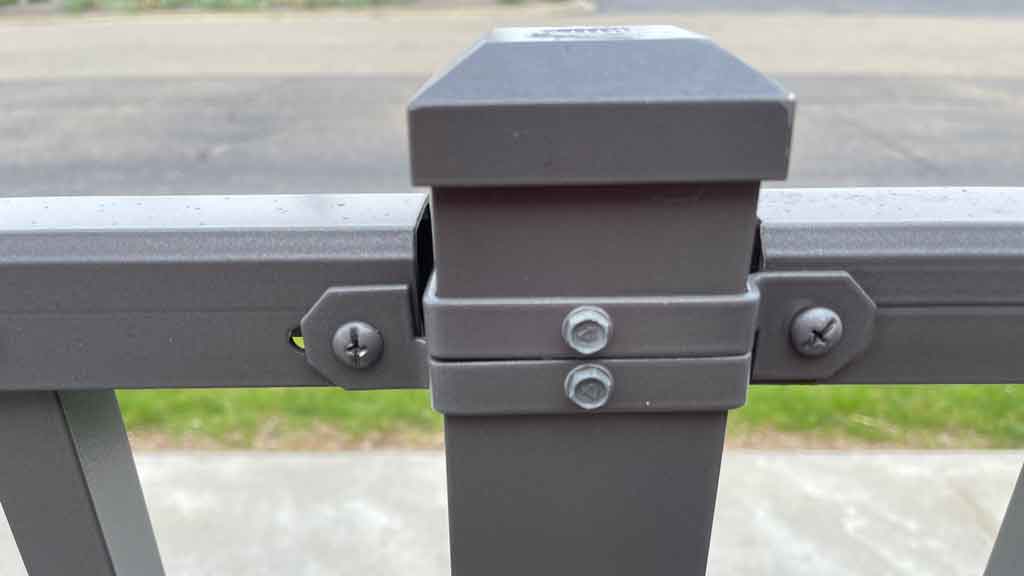
The aluminum fence panels attach to the posts using brackets. Each manufacturer has their own design. However, they all normally wrap around the post and use a nut and bolt to attach the panels.
The panels have pre-drilled holes at the end of each rail to accept the hardware. Panels that require cutting for shorter sections will also require drilling new holes through the rails.
Installing Aluminum Fence with Brackets
Just like the routed post aluminum fence installation, use stakes and a string line to establish each fence line. Once complete, dig the first hole to depth and set the post using concrete. Make sure it is plumb to the string line.
Measure the rest of the holes using the spacing provided by the manufacturer. It is a good idea to mark the locations on the ground using marking paint. Dig all of the holes and clean out the loose spoils with post hole diggers.
It is crucial that the measurement between the posts is exactly what is specified by the manufacture. Any measurement larger and the panel will be too short. A shorter measurement and the panel will require cutting in order to fit.
Use a 2×4 cut to the inside dimension as a spacer while setting posts. Therefore, ensuring the correct measurement is met. Allow at least 24 hours for concrete to harden before attaching the aluminum fence panels.
Follow the manufacturers instructions for attaching the brackets and panels. A huge benefit to aluminum fence installation with brackets is that the fence height is adjustable during installation.
As result, allowing the panel to raise or lower to accommodate grade changes. The last step is to cut the posts to height after the panels are adjusted to the desired look.
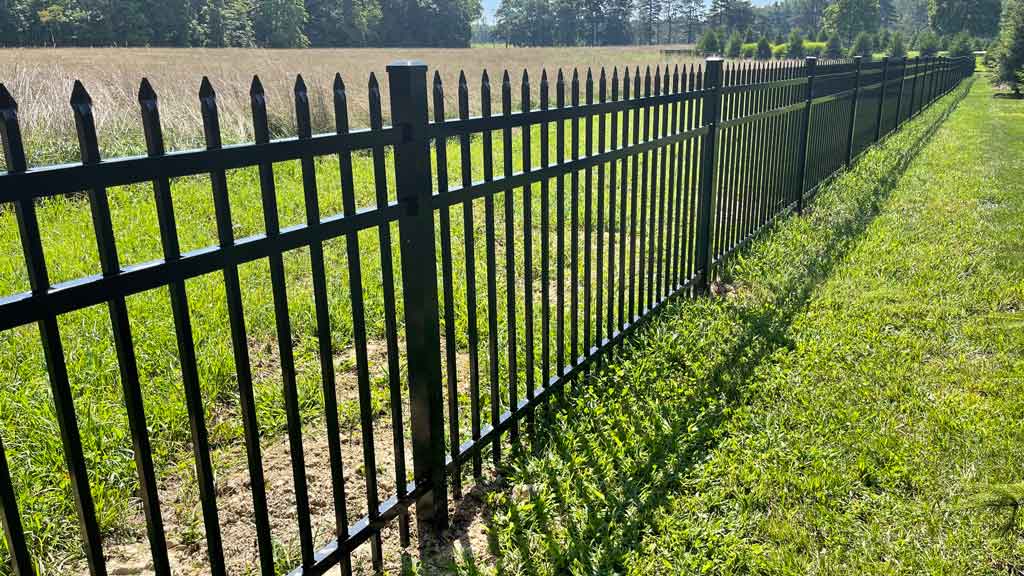
Conclusion
Aluminum fence provides a timeless look of class and elegance. Combined with lifetime warranties without maintenance and it’s no wonder they are so popular with homeowners.
However, the cost of having one professionally installed simply does not fit into every household budget. Therefore, choosing to tackle an aluminum fence installation yourself might be just the answer to lowering costs and getting the fence of your dreams.
With a little hard work the savings could amount to thousands. As a result, bringing the cost of the fence into budget.
